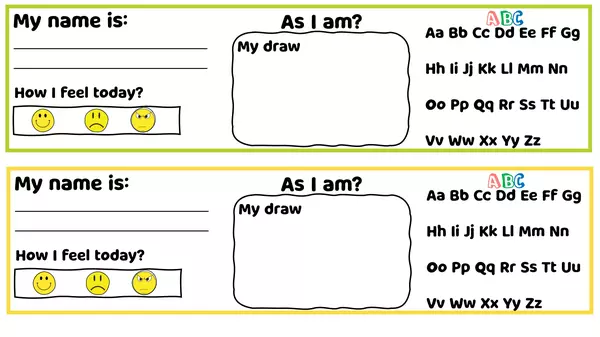
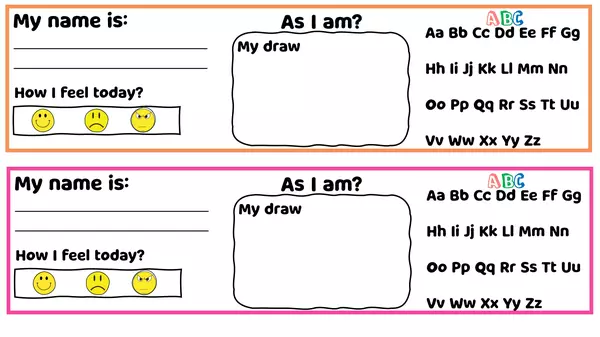
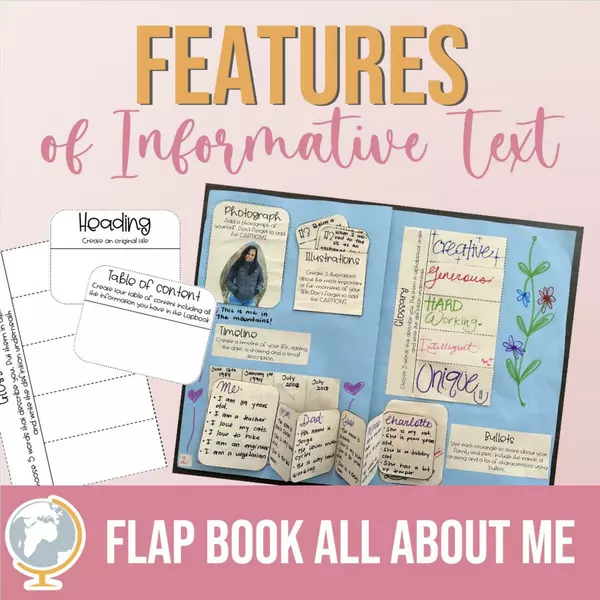
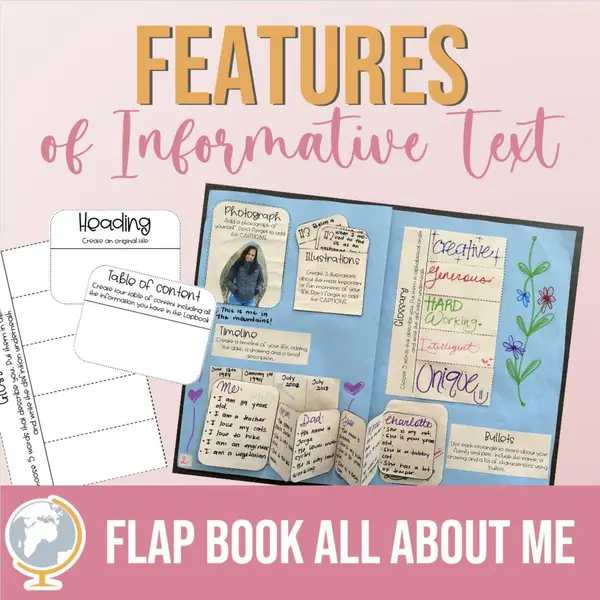
Engage your students in the world of informative writing with this fun and interactive flap book! Through this hands-on resource, students will practice key features of informational texts while creatively sharing all about their lives. Perfect for bringing writing to life in a meaningful and personal way!
How to Use this Resource:
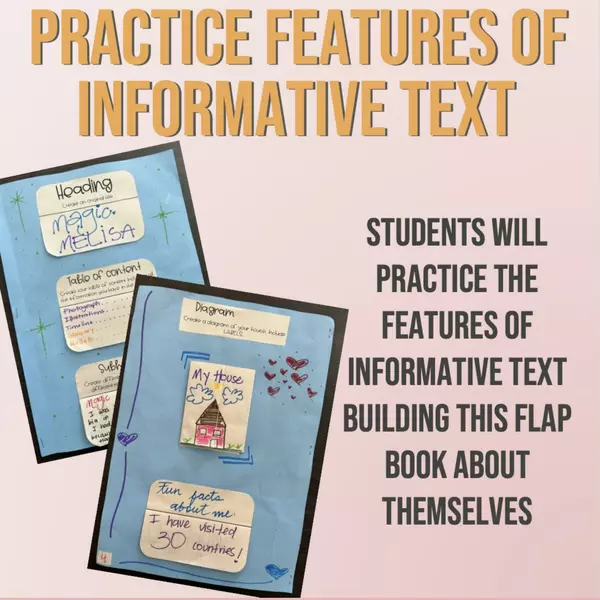
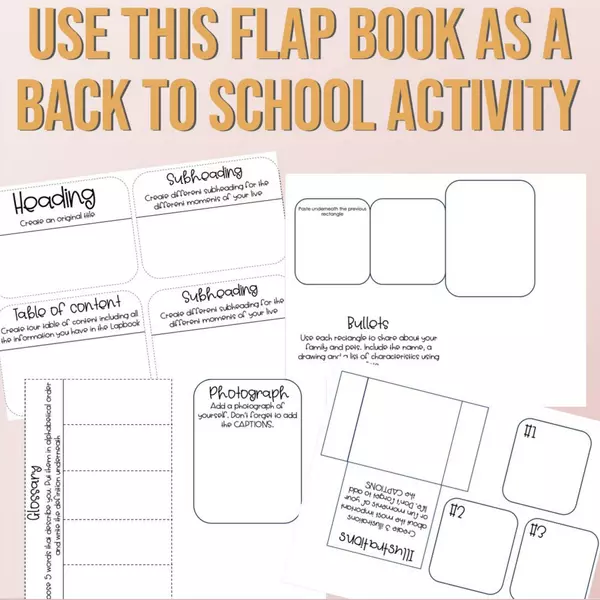
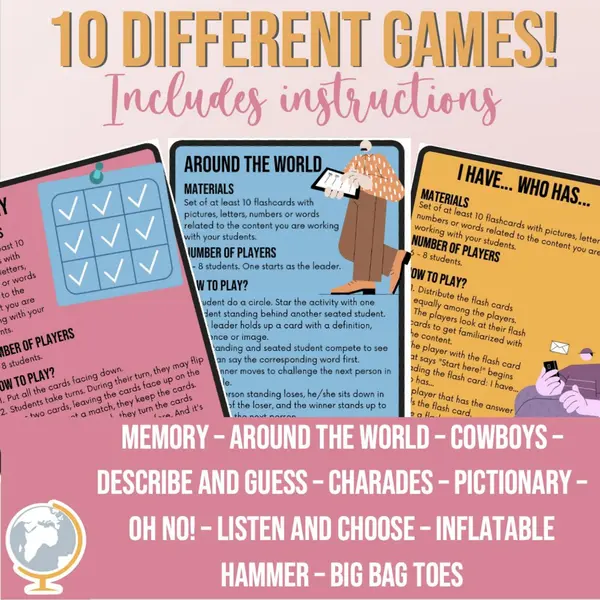
1. Back-to-School Icebreaker: Have students create their flap books as a get-to-know-you activity while practicing writing features like headings, captions, and diagrams.
2. Peer Review: Encourage students to swap flap books and review each other’s work, identifying the different features of informational text used in the book.
3. "Guess Who" Game: After completing their flap books, have students remove their names and play a game where classmates guess who each flap book belongs to, based on the details provided.
BONUS!
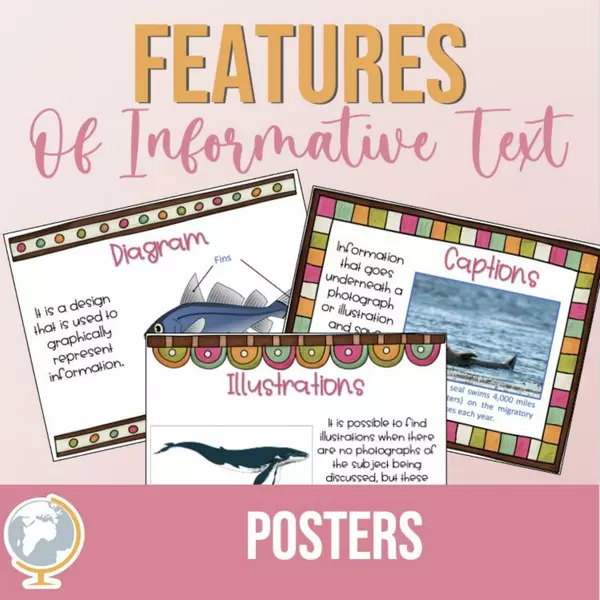
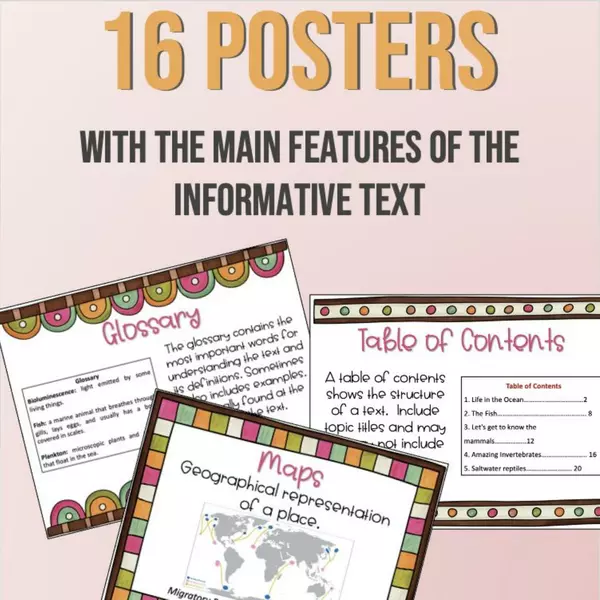
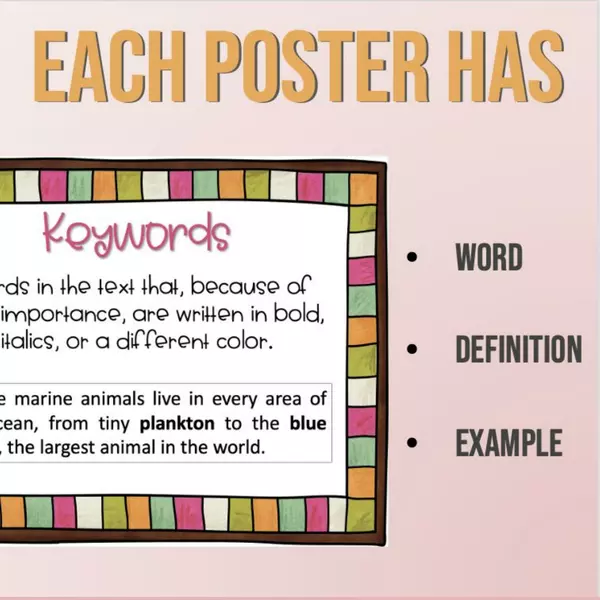
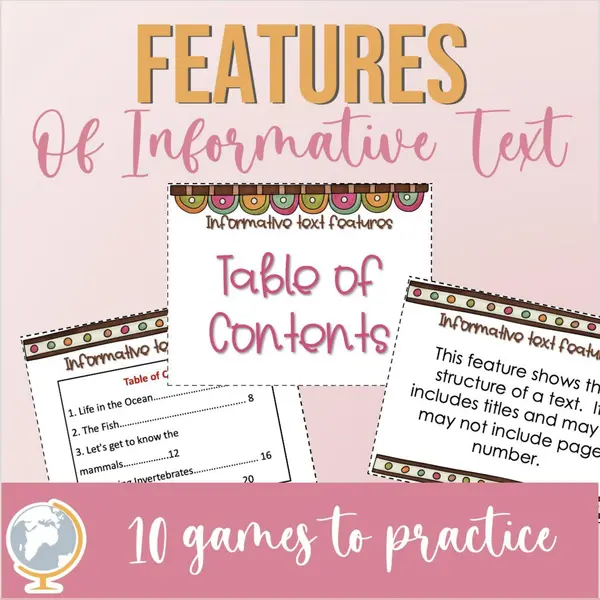
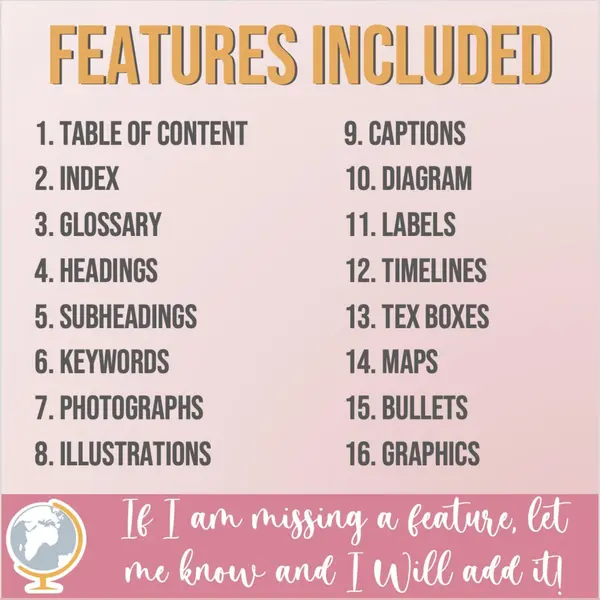
16 posters that cover the different Features of Informative Text:
- Table of contents
- Index
- Glossary
- Heading
- Subheadings
- Keywords
- Photographs
- Illustrations
- Captions
- Diagram
- Labels
- Timelines
- Text Boxes
- Maps
- Bullets
- Graphics
Each poster includes:
- Text Feature
- Definition
- Example
If you liked this resource and it was useful for your class and your students, follow my store for more products.
Don't forget to RATE this product!
Are you looking for this resource in Spanish? Here is the link
 5
5


There are no comments yet, write one yourself!